
Transactions Section Guide
The Transactions tab contains the lists of all payment transactions history for your account.
Locating the Transactions Page
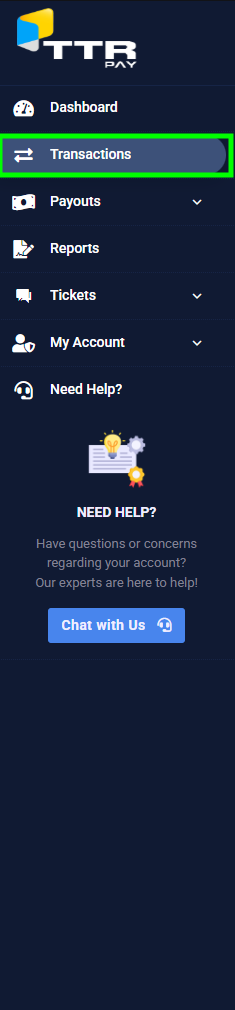
- Log in to TTR Pay: After logging in, you will land on your main dashboard.
- Open the menu: If the left sidebar menu is hidden, click the Menu icon (≡) in the top left to expand this menu.
- Find “Transactions”: In the sidebar, locate the Transactions section (it may already be expanded by default).
Viewing the Transactions List
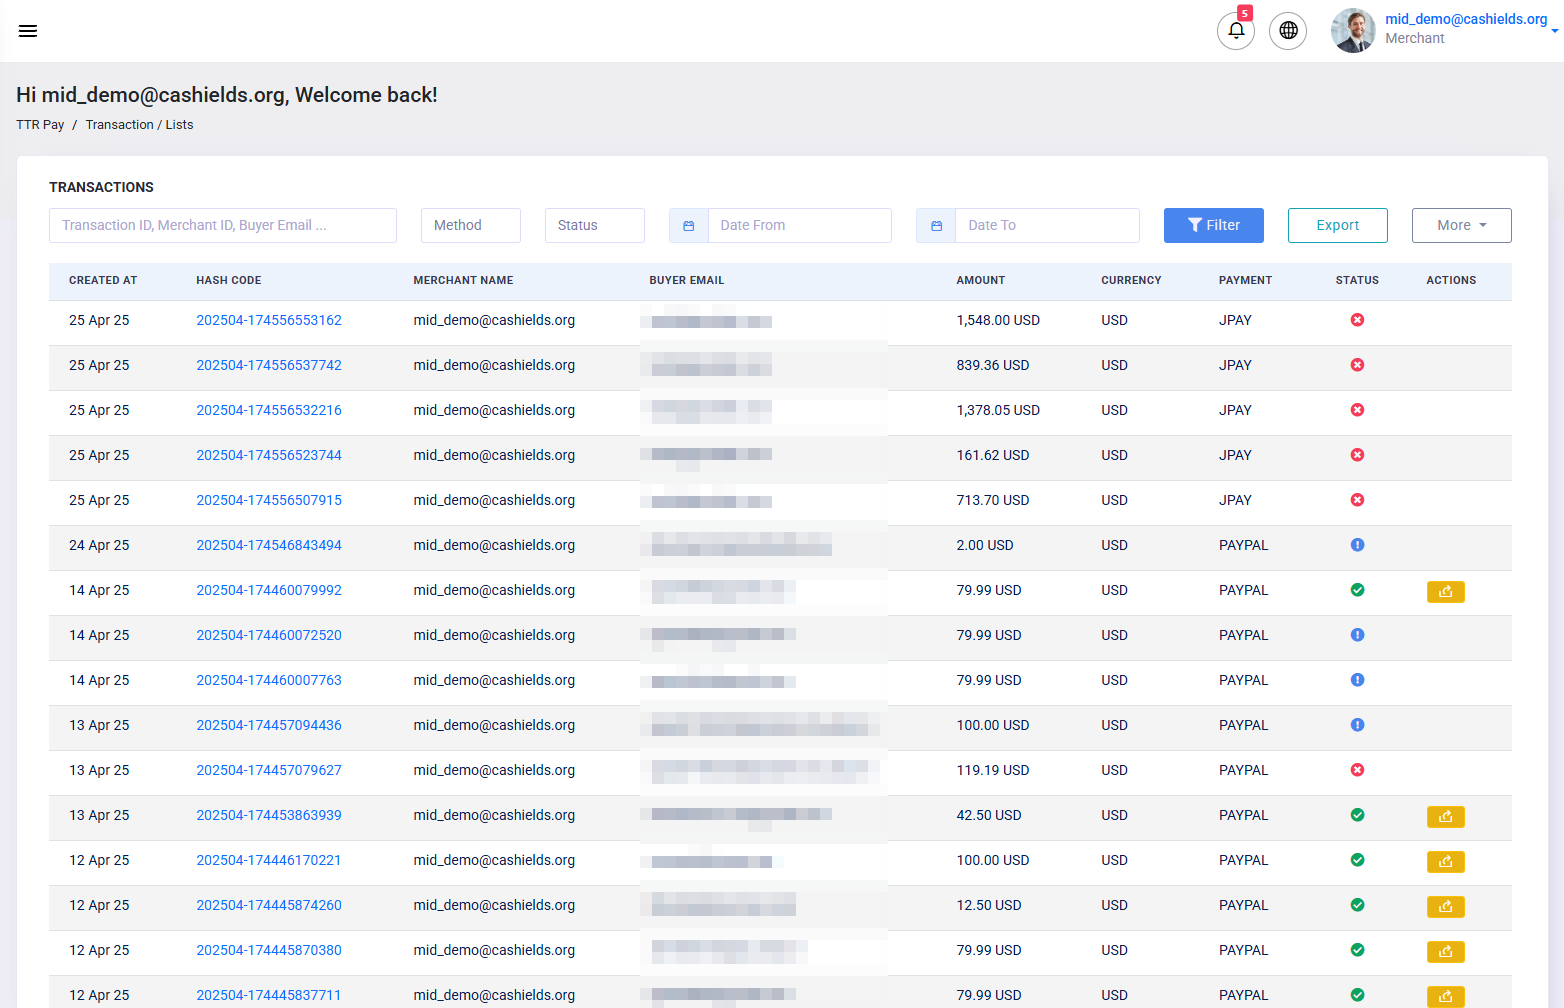
Once you open Transactions, a table displays every payment record. Each row is one transaction with columns such as:
- Created At: The date and time when the transaction was created.
- Hash Code: A unique transaction ID. You can often click the hash to view more details about that transaction.
- Merchant Name: The name or ID of your merchant account that received the payment.
- Buyer Email: The email address of the customer who made the payment.
- Amount: The total amount paid in that transaction.
- Currency: The currency of the payment (for example, USD or EUR).
- Payment Method: Which payment method was used (for example, JPay or PayPal).
- Status: The current state of the transaction (such as Success, Pending, or Failed).
- Actions: Icons or buttons for actions you can take on the transaction (for example, viewing details or issuing a refund).
This table is sortable and scrollable, allowing you to browse through all your transactions in chronological order.
Searching and Filtering Transactions
Above the table are filter fields to help you find specific transactions. For example:
- Transaction ID/Merchant ID/Buyer Email: Use the first search box to enter a transaction’s ID (hash code), a merchant ID, or a buyer’s email. Typing in one of these will narrow the list to matching transactions.
- Method: Select a payment method from this dropdown (e.g. JPay, PayPal) to see only transactions made with that method.
- Status: Choose a status (such as Success, Pending, Failed) from this dropdown to filter by transaction outcome.
- Date From / Date To: Pick start and end dates to view transactions within a specific date range.
After setting your criteria, click the Filter button to apply the filters. (You can also click Export to download the filtered list if needed.) These search and filter options make it fast to locate specific transactions among many.
Customizing Transactions Table Display
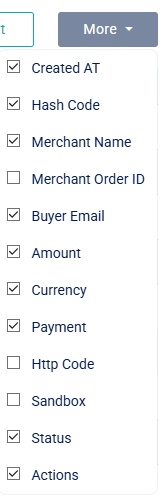
If you need additional information in the table, use the More dropdown above the table. Clicking More expands a list of extra columns that can be shown or hidden. For example, you could check:
- Merchant Order ID to display the merchant’s internal reference number.
- Http Code to include the payment gateway’s response code for each transaction.
- Sandbox for accounts and transactions in test mode.
Uncheck any box in the More menu to hide that column. This allows you to customize the table view, displaying only the columns that are relevant to you.
Refunding a Transaction
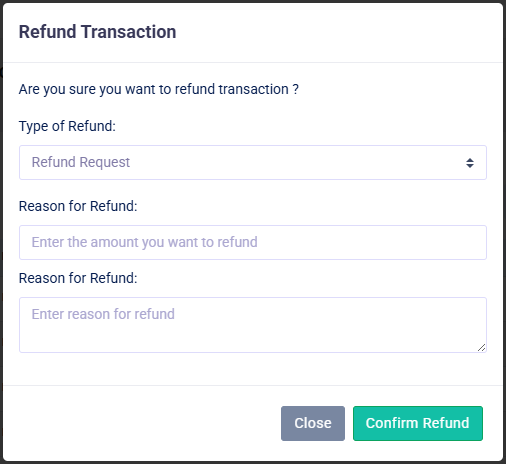
To issue a refund for a payment, click the orange refund icon (a right-pointing arrow ![]() ) in the Actions column next to the transaction you want to refund. This opens the Refund Transaction popup. In this popup, fill in the following fields:
) in the Actions column next to the transaction you want to refund. This opens the Refund Transaction popup. In this popup, fill in the following fields:
- Refund Type: Select the refund type. Currently, the only option is Refund Request. This option sends a refund request through TTR Pay’s support process.
- Amount: Enter the amount to refund. You can specify a full refund or a partial refund (in the transaction’s currency).
- Reason: Provide a brief explanation or reason for the refund (for example, “Order canceled” or “Product not delivered”).
After completing these fields, click the confirmation button in green to initiate the refund. Remember to double-check all details before submitting. Only process a refund after you have verified the buyer’s request or confirmed that a genuine issue occurred with the transaction.
Tips for Managing Transactions
- Use the filters at the top (ID, merchant, email, date range, etc.) to quickly locate specific transactions instead of scrolling through the whole list.
- Always double-check transaction details (such as the amount, buyer email, and status) before issuing a refund to avoid mistakes.
- Only issue a refund after confirming the buyer’s request or resolving any issue; refunds should be handled carefully and responsibly.
These practices will help you work efficiently in the Transactions section and avoid errors when managing payments and refunds.
Leave a Reply